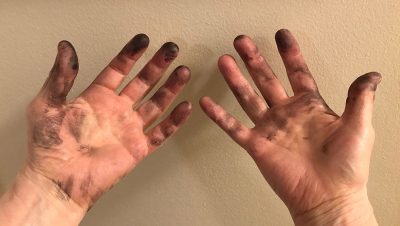
EXHIBIT A: Yep, pretty much from the time I was 9 and got my first dip pen my hands have looked like this. Teachers gave up on me until Mrs. Osbourne, my First Form art teacher tried to make me clean up my act. Alas, as we can see from this photo, after all these decades I can say I’m not really much tidier with the ink, but I am more proficient with the ink. Thank you Mrs. O. (And on this trial day I managed to save my clothing even though I wasn’t wearing a smock.)

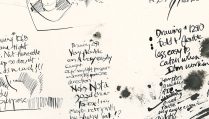
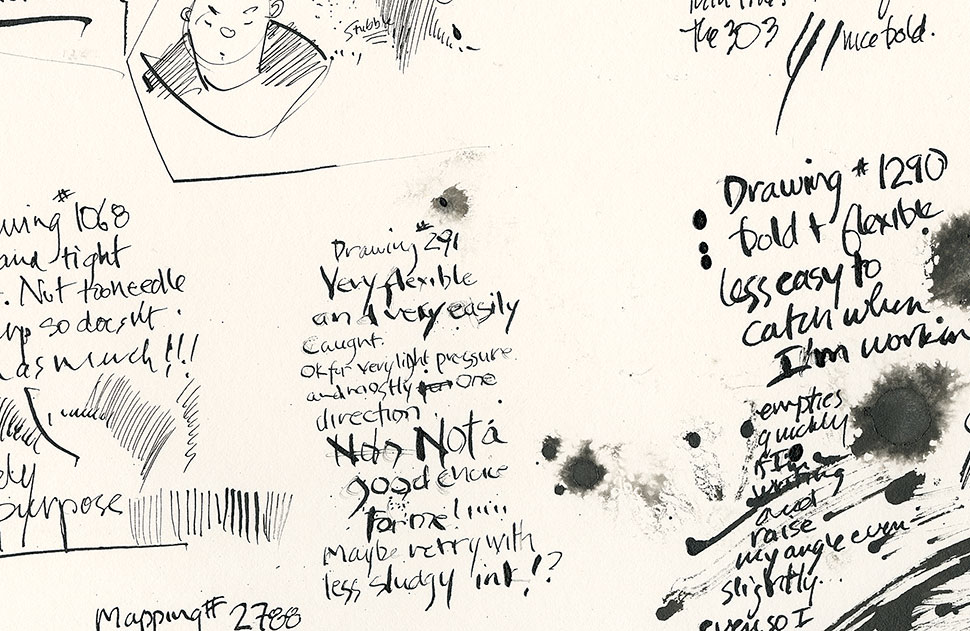
EXHIBIT B: What started out as excitement to take notes while I tried out the new batch of Gillot pen nibs, turned into an impromptu chart of sorts. If you’re interested in any of these nibs some of the text might help you decide whether or not to pick one up.
Why Am I Testing These Nibs Now?
For the last 10 or more years I’ve really been using Japanese nibs more than any of the nibs I grew up with—including the Gillott nibs.
Lately Patreon students had been asking me about nibs and I wanted to give them a wider range of options.
I cycle through periods of time when I do a lot of dip pen sketching and then I return to the brush pen. It’s just the rhythm of my sketching life. I don’t think you ever forget your roots though. And I think you always long for the comfort of that earlier familiarity; and the dazzling line.
And by dazzling line I don’t mean that I was a child prodigy creating beautiful works, I’m simply saying that from childhood nothing has appealed to my eye as beautiful as an ink line. On an accommodating piece of white (or even, gasp, cream paper) the sharp crispness of that ink as it flows out of the pen nib and cuts across the paper (because dip pen is a rather aggressive medium for some practitioners, including myself) amazes me by the way it dazzles along that trail.
You could say that when I use the dip pen I’m instantly 9 years old again, only with a few more skills and a little better grasp on lighting, observing, and on pen pressure.
How to Get Started with Dip Pen?
There are books galore. I still love “Rendering in Pen and Ink” by Arthur Guptill. Pretty much everyone who has ever written a book on ink has a debt to pay him. So I’d start there.
More recently comics illustrators have written books on inking comics, or published blog posts. I would seek them out. I looked once for my students and there are thousands. Find someone with a sympathetic line and read a little and you’ll know if they know their stuff.
Also it will be helpful for you to actually see someone sketch in pen and ink. Eventually some of my dip pen videos may show up on YouTube. I promised Patreon subscribers I’d wait to share then so they were getting exclusive stuff. I’m not ready to go back and look at any of them and re-edit with a new voice over for a new group. But don’t wait for that. There are tons of people using dip pen. The point is you’ll find someone sketching with a dip pen, so dive in.
The One Thing You Really Must Never Ever Do to Your Nibs
There are a lot of myths in art materials. They spread like rumors among the art and craft communities; they are parroted back and forth so often they have a weight to them. But it doesn’t always make them true or useful. And they aren’t backed by research or practice.
I learned to use a dip pen by reading old art manuals and pamphlets. And by watching advertising artists work with them. (Take your daughter to work day was a thing even before it was a thing!) Some of the practices I observed of those artists are no longer sound practices.
But those practices have been turned into “rules” in the shared mill of information on the internet. People heard something and took it to heart. But we need to constantly ask questions.
Currently, on the internet, people with a mixed bag of training, little logged practice, and scant understanding of their materials teach while perhaps not knowing the original reason for some rule of tool handling. They end up telling followers to do something that just is not only unnecessary but harmful.
If you’re going to consume information off the internet you need to question what the information is based on. You want to find someone who has skill and mastery of the type you’re looking for. And you want someone who can explain the “reasons” for methods and tool handling in a reasonable, fact-based way. It can be daunting to sift through all the information you may have to wade through. But the best way to do this is to always ask questions. If the person stating the “rules” isn’t available, you can still research past methods and approaches in books. You can find practitioners to talk with. You can use all this to cross-check the information you’re finding. If it matters to you then you can find reasons and understanding. I believe it needs to matter to you. It’s part of showing up for your art.
When “rules” and methods are not fully understood a lot of myths or bad practices get passed down. If you aren’t asking questions you are prey to misinformation.
Treatment of the dip pen involves a lot of this misinformation.
There are people with dip pen videos who will tell you with a serious face—”put the nib in your mouth to dissolve the coating on the nib so the ink will flow.”
Look you do need to clean a brand new nib before you use it because it has a coating on it meant to protect the metal nib from corrosion.
BUT NO. Don’t put a nib in your mouth!
I don’t have to be your mom to tell you this. Just a concerned bystander. Don’t do that. I don’t care if you have the right acidity or pH level, or whatever this person was claiming, in your mouth. Don’t do that. You wouldn’t put car parts in your mouth would you? And do you put razor blades in your mouth? Some nibs have razor sharp (or nearly) edges on them. What if someone comes into your space while you’ve got the nib in your mouth, startles you, and you start to swallow it? I know that’s an extreme, but I like to think things through. Before you go putting a nib from a factory, with industrial coating on it, in your mouth I hope you think it through. Don’t do that!
ALSO NEVER EVER flame your nib! This is the old practice (by some artists) of holding the nib in a match flame, lighter flame, or candle flame to burn off the industrial coating.
Why shouldn’t you do that? Well watch a couple episodes of “Forged in Fire” and you’ll understand all about tempering metal and what happens when you reheat it. I’ll give you a clue—the metal becomes soft in some places and at the edge of the heating it becomes BRITTLE. You ruin the temper.
You might argue that the match-, lighter- or candle-flame isn’t that hot, but it is. Equally important the nib is very thin. You’ll get distracted and you’ll hold the nib there too long, or you won’t move it about as much as you needed to—just don’t do it.
After 58 years of dip pen use I can tell you that even if you are methodical that method is going to hurt your nibs. I was methodical from ages 9 to 23. I broke a ton of nibs. I’m sure it was because of the use of flame. (Those advertising artists I observed as a child, all smokers, and all flaming their nibs, just because.)
When I was 23 I moved in with Dick, who as you know happens to be an engineer and a mechanic. (We watch “Forged in Fire” together because I like to watch it and see blades made, while having the option to stop the show and ask him questions about metal and fabrication.) I remember one day after I moved in with him, I asked him for a match. As he moved to the cupboard where the matches were he asked me what I wanted it for. I said, “I need to flame a new pen nib.” Then he got that constrained look a really calm person gets when he is simultaneously horrified and genuinely concerned about the speaker’s sanity.
He pointed to the dish detergent and said, “give it a wash.”
Since then I have only broken two nibs. One was over-used and ready to move on; it was just making a dramatic dying point in my hand. The other, well that was all my fault as I was trying to show a group of in-person students how to spring a nib because of the nifty ink effects that would happen. Oops, my bad.
So let’s look at the tote board:
14 years—all flamed—tons of nibs failed through breakage—variety of brands
44 years—dish soap—two nibs broken—variety of brands
You do the math.
Times change, new scientific knowledge can inform and improve our artistic practices. We’d be foolish not to change the “rules.”
Frankly, if you find a video where someone tells you to suck on your nib to clean the industrial coating off, or someone tells you to flame it, unless you love their artwork and just want to see them draw, just keep moving and looking for a different dip pen guru! It will end badly.
When cleaning your new nibs use detergent (not soap) and rinse thoroughly.
Tools You’ll Need
To work with dip pen you’ll need the following:
A selection of nibs (today’s chart will help you; I also like the G-school Nib, a lot of nibs from Brause…think of it like flavors of ice cream—you have to put in a little bit of time to find the one you really love; and you’ll want different ones for different jobs; e.g., I wouldn’t put chocolate ice cream on my chocolate cake—but maybe you would.)
A good pen holder. You can get one that’s very inexpensive. I really like the comic pen nib holders made by Tachikawa because I have small hands and their holders balance really nicely in my hand. I recommend you get at least 2 holders. Make sure you get a universal holder that will hold circular nibs and half-circle nibs.
A good ink. When I was younger I used India Inks. But in my 20s I switched to acrylic inks, mostly FW Acrylic ink. Somewhere in my 40s I found Ziller Acrylic ink and now I almost always use it. I like their Glossy Black. I also use their color inks (also acrylic). It’s what I feel like at the time. But for sketching I mostly use Ziller’s Glossy Black.
A small paint “jar” with a cap—thimble size. This is to decant your ink into, so you don’t contaminate your bottle of ink by dipping directly into it with a dirty nib or tool—or leave that large bottle open and get a skin on the ink. And also if you spill from this thimble-sized “jar” you don’t have a lot of clean up. (Note: Exhibit A is an unusual circumstance not caused by issues with the small thimble-sized jar on the day.)
A 6 x 6 inch square of stiff cardboard to glue the small thimble sized paint “jar” to. This will allow you to place the thimble of ink near at hand for dipping, without knocking it over, and without needing to hold it precariously over your drawing surface.
Quality paper: I recommend Strathmore 500 series Plate Bristol 3-ply. I would recommend 5-ply but they seem to have stopped making it. If they make 5- or 4-ply that is your best bet. But at least 3-ply. Series 500 is their cotton paper line, it’s the top of the line. The plate finish on that paper is SMOOTH. I’ve used a lot of other Plate Bristol from other companies, Strathmore 500 Series Plate Bristol is the best. If you get their 200 or 300 series Plate Bristol that is NOT the same thing. Those are student grade papers.
You want to use the 500 series paper because you’re going to have enough trouble learning the new medium without fighting a paper. I wouldn’t even try to learn dip pen on any other brand of paper, and would only recommend the 500 series, so there you have it. Now if you already know how to use a dip pen you can use any paper you want. Something to look forward to. In the meantime buy a big sheet of Strathmore 500 series Plate Bristol in at least 3-Ply (but 4- or 5- if you find it, and if you do write to me immediately and let me know where!) and cut it up into smaller pieces like 6 x 8 inches or whatever size you like to work. It will be the best money you spend on art supplies all year.
Update 4.26.24 at 9:55 p.m.: A friend emailed me that Blick is currently selling 4-ply Strathmore 500 Series Bristol in Plate and Vellum.
And for the observant amongst you—yes the chart is on Strathmore Vellum Bristol. That’s simply because the Plate Bristol is still packed. I didn’t want to search for it, and I wanted a textured surface to do my tests on.
The above is all you really need.
These materials can be purchased at art supply stores like Wet Paint in St. Paul. Or if you do everything mail order you can use Jetpens.com. Jet also has a lot of videos discussing nibs and holders on their site. I’m not financially connected to any vendors or nib manufacturers.
When you’ve finished using a nib wipe the ink off it with a paper towel (Bounty, quality matters) or lint free cloth, and remove the nib from the holder. Clean off the top the holder (so the nibs can go in an out unhampered by dry ink buildup, but don’t worry about the stains—I don’t, see Exhibit A above). Then if your nib still has visible ink on it you can wash it gently with water (even dish detergent) but you MUST DRY IT COMPLETELY, don’t just set it aside and don’t just leave it in the holder. It will rust. You may not be able to get it out of the holder which would mean throwing away a perfectly good holder when the nib was worn.
OK Some Really “Fancy” Add-ons
Ninety percent of the time, when I use dip pens I put on light cotton gloves with the finger tips cut away. These are conservationist’s gloves. This isn’t some Bob Cratchit* heat conservation gambit. I do it because I want to keep my hand off the paper at all times. I started doing this when I was young and it’s useful for me because it’s habitual. (You want to keep your hand off your paper because even if you don’t use lotions or cream and are as cool as a cucumber your hands sweat and produce natural oils. These will go onto the paper and alter the surface. Additionally the weight of your hand can depress the tooth of the paper. The movement of your hand across the surface of that paper can mar it in other ways. Nothing is so disheartening as working hours on a piece only to find in the last few minutes that you can’t get consistent paint or ink application on the area of paper you touched.)
If you just start in wearing finger-less gloves when you first use a dip pen you might forget yourself and put your gloved hand in an ink passage—frankly that might be the best thing that could happen to you because high spatial awareness and understanding of ink drying times are two things you want to learn early in your ink career to avoid worse heartache later.
You could simply use a clean sheet of copier bond under your drawing hand. Or you could use a drawing bridge to hold your hand up off the paper. Now that you know these are all things you can do, pick the one that suits your temperament. (I almost always use the drawing bridge when I’m working in color pencil because the moving of the protective sheet can cause smudging. But that’s just me.)
Some people like to do an initial drawing with Non-Repro-Blue pencil. (I’ve written about these before, the color of the lead isn’t picked up by the camera if you’re scanning artwork; old illustrator’s (and I’m an old illustrator and graphic designer), used these pencils for a host of reasons, but some comics artists like to use them to get their sketch down before doing the inking (and sometimes a different artist does the inking). You can find videos of people working with Non-Repro-Blue pencils if that’s of interest to you.
When I’m sketching in ink with dip pen I’m just drawing with the pen and no pencil lines. It’s just fun that way for me.
Long ago when I had to be more precise I would often do one pen sketch, or a series of pencil sketches that I refined using tracing paper, and then put a “final” sketch on my light box and tape my Bristol on top of that and ink my drawing. Why do it that way? I really love paper and I absolutely detest how any erasing marks up paper and destroys the tooth or finish. By using the light box I don’t have any erasing to do. And I don’t have to fiddle with getting the blue lines to disappear.
Again, try a couple things and see what works for you. Currently several companies are making inexpensive lightweight (easily put away on a shelf) LED light boxes if that’s something you want to use.
There You Have It
So there you have it—supply list, some tips, a possibly helpful chart, and some definitely helpful cautionary tales.
Get sketching.
______________________________________
*Don’t know who Bob Cratchit is? Ah. Pain. Dickens’ “A Christmas Carol,” he’s the father of Tiny Tim, and he works as a clerk in absurdly harsh conditions (Scrooge, his boss, thinks coal too expensive) and is typically depicted in the many film versions (if not the original book illustrations, but I can’t check because my entire shelf of Dickens is still in storage) as wearing fingertip-less hand warming gloves.

